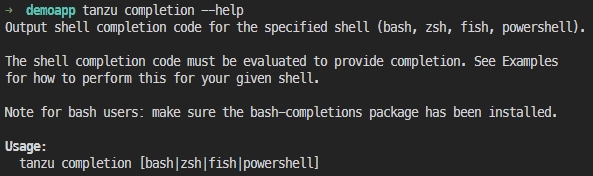
(Tùy chọn) Nếu bạn muốn định cấu hình hoàn thành tanzu, vui lòng chạy lệnh bên dưới và làm theo hướng dẫn đầu ra
tanzu completion --help
2
Bước 2: Tạo deployment cluster-autoscaler từ gói tanzu bằng tanzu-cli
Chuyển sang context Kubernetes của bạn
kubectl config use-context <your context name>
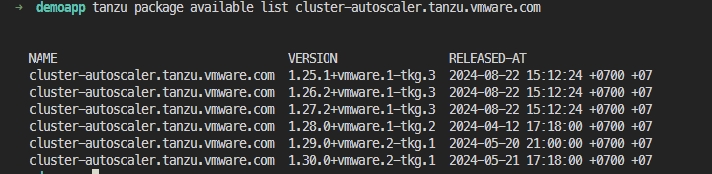
Liệt kê các phiên bản cluster-autoscaler có sẵn trong gói tanzu và ghi lại tên phiên bản
tanzu package available list cluster-autoscaler.tanzu.vmware.com
Tạo secret kubeconfig có tên cluster-autoscaler-mgmt-config-secret trong namespace kube-system
kubectl create secret generic cluster-autoscaler-mgmt-config-secret \
--from-file=value=<path to your kubeconfig file> \
-n kube-system
Không thay đổi tên secret (cluster-autoscaler-mgmt-config-secret) và namespace (kube-system).
Tạo file cluster-autoscaler-values.yaml
arguments:
  ignoreDaemonsetsUtilization: true
  maxNodeProvisionTime: 15m
  maxNodesTotal: 0 #Leave this value as 0. We will define the max and min number of nodes later.
  metricsPort: 8085
  scaleDownDelayAfterAdd: 10m
  scaleDownDelayAfterDelete: 10s
  scaleDownDelayAfterFailure: 3m
  scaleDownUnneededTime: 10m
clusterConfig:
  clusterName: "demo-autoscale-tkg" #adjust here
  clusterNamespace: "demo-autoscale-tkg-ns" #adjust here
paused: false
Giá trị bắt buộc:
clusterName: Tên cluster của bạn
clusterNamespace: Tên cluster namespace của bạn
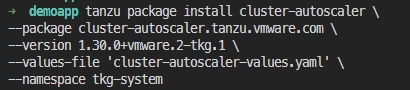
Cài đặt cluster-autoscaler
tanzu package install cluster-autoscaler \
--package cluster-autoscaler.tanzu.vmware.com \
--version <version available> \ #adjust the version listed above to match your kubernetes version
--values-file 'cluster-autoscaler-values.yaml' \
--namespace tkg-system #please do not change, this is default namespace for tanzu package
Cluster-autoscaler sẽ được triển khai vào namespace kube-system.
Chạy lệnh dưới đây để xác minh việc triển khai cluster-autoscaler:
kubectl get deployments.apps -n kube-system cluster-autoscaler
Cấu hình số lượng node tối thiểu và tối đa trong cluster
Lấy tên và namespace của machinedeployments
kubectl get machinedeployments.cluster.x-k8s.io -A
Cấu hình cluster-api-autoscaler-node-group-min-size and cluster-api-autoscaler-node-group-max-size
Vì bước này cần có sự cho phép của nhà cung cấp để thực hiện nên vui lòng thông báo cho cloud provider để thực hiện bước này.
3
Bước 3: Kiểm tra tự động mở rộng cluster
Lấy số lượng node hiện tại
kubectl get nodes
Hiện tại chỉ có một worker node.
Tạo file test-autoscale.yaml
apiVersion: apps/v1
kind: Deployment
metadata:
  name: nginx
  namespace: default
spec:
  replicas: 2
  selector:
    matchLabels:
      app: nginx
  template:
    metadata:
      labels:
        app: nginx
    spec:
      containers:
      - name: nginx
        image: nginx
        ports:
        - containerPort: 80
      topologySpreadConstraints: #Spreads pods across different nodes (ensures no node has more pods than others)
      - maxSkew: 1
        topologyKey: kubernetes.io/hostname
        whenUnsatisfiable: DoNotSchedule
        labelSelector:
          matchLabels:
            app: nginx
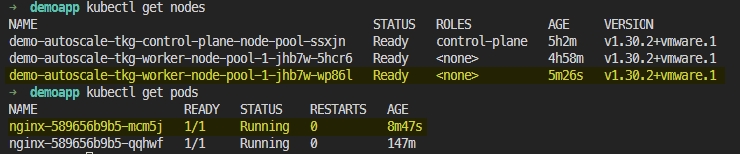
Áp dụng file test-autoscale.yaml để triển khai 2 replicas nginx pod trong namespace default (lệnh này sẽ kích hoạt tạo một worker node mới)
kubectl apply -f test-autoscale.yaml
Kiểm tra deployment nginx
kubectl get pods
kubectl describe pod nginx-589656b9b5-mcm5j | grep -A 10 Events
Bạn sẽ thấy một nginx pod mới với trạng thái Pending và các sự kiện hiển thị FailedScheduling và TriggeredScaleUp:
Warning  FailedScheduling  2m53s  default-scheduler   0/2 nodes are available: 1 node(s) didn't match pod topology spread constraints, 1 node(s) had untolerated taint {node-role.kubernetes.io/control-plane: }. preemption: 0/2 nodes are available: 1 No preemption victims found for incoming pod, 1 Preemption is not helpful for scheduling.
Normal   TriggeredScaleUp  2m43s  cluster-autoscaler  pod triggered scale-up: [{MachineDeployment/demo-autoscale-tkg-ns/demo-autoscale-tkg-worker-node-pool-1 1->2 (max: 5)}]
Chờ một chút và bạn sẽ thấy một worker node mới đã được cấp phát và nginx pod mới có trạng thái Running.
Dọn dẹp tài nguyên thử nghiệm
kubectl delete -f test-autoscale.yaml
Sau khi xóa deployment nginx thử nghiệm, cluster sẽ chờ vài phút để xóa node không cần thiết (tham khảo giá trị scaleDownUnneededTime trong file cluster-autoscaler-values.yaml).
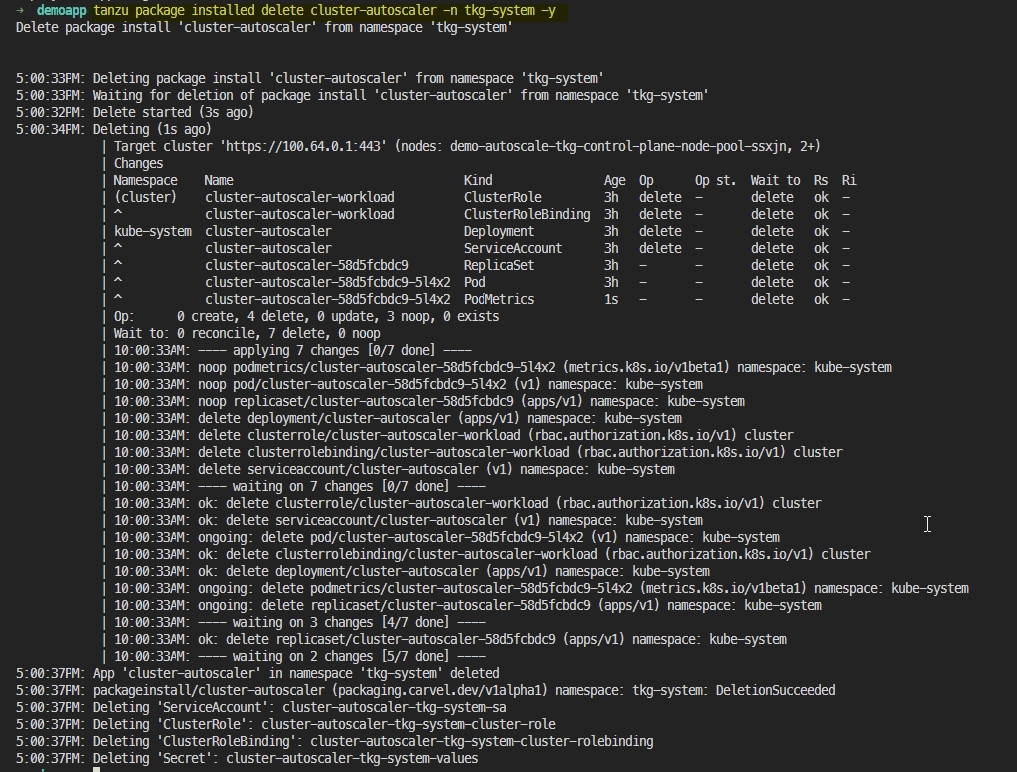
Xóa deployment cluster-autoscaler (Tùy chọn)
Nếu bạn không muốn cluster của mình tự động mở rộng nữa, có thể xóa deployment cluster-autoscaler bằng tanzu-cli: