> For the complete documentation index, see [llms.txt](https://docs.higiocloud.vn/llms.txt). Markdown versions of documentation pages are available by appending `.md` to page URLs; this page is available as [Markdown](https://docs.higiocloud.vn/hi-gio-user-guide-vn/compute/1.-thao-tac-voi-vm/tao-may-ao-moi-tu-template.md).
# Tạo máy ảo mới từ Template
## Tổng quan
Để đơn giản hóa việc tạo một máy ảo (VM), bạn có thể sử dụng template máy ảo dựng sẵn từ catalog.
## Quy trình
{% stepper %}
{% step %}
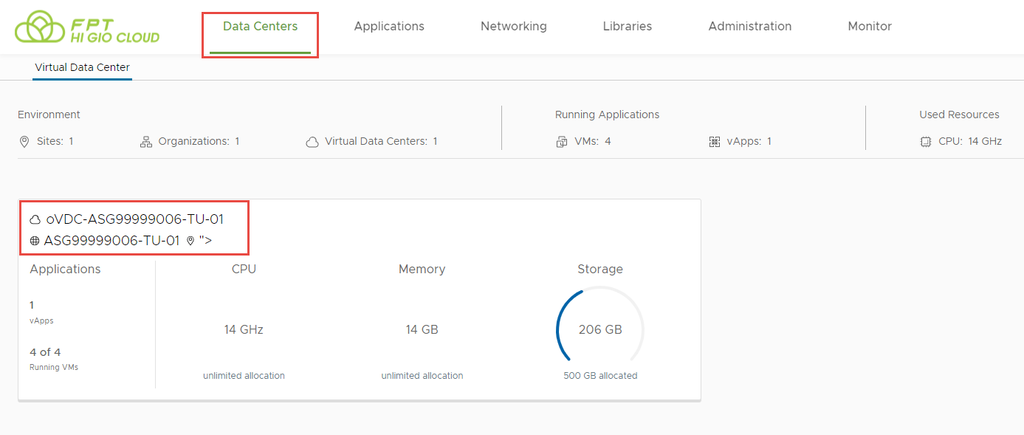
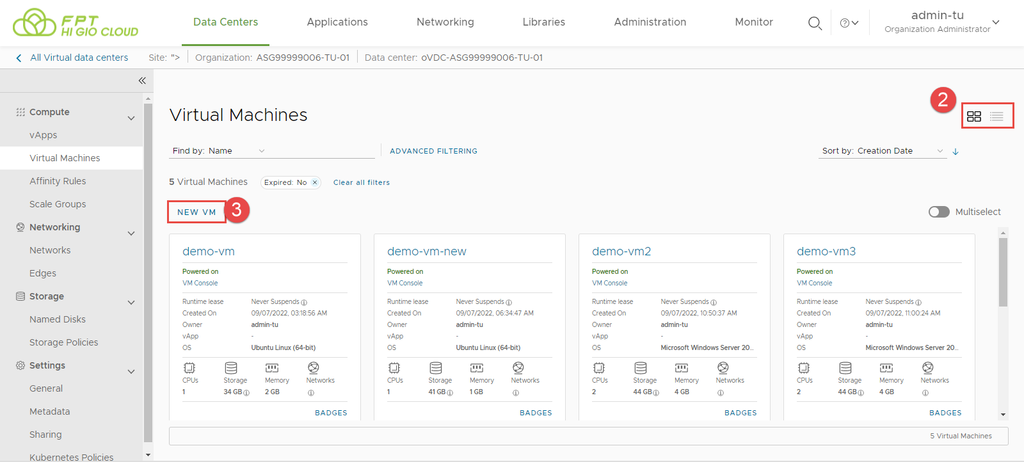
**Bước 1**: Trên màn hình bảng điều khiển **Virtual Data Center**, nhấp vào thẻ của trung tâm dữ liệu ảo mà bạn muốn truy cập, và từ bảng bên trái, chọn **Virtual Machines**.
{% endstep %}
{% step %}
**Bước 2**: Chọn **Card View** hoặc **Grid View** để xem các máy ảo.
{% endstep %}
{% step %}
**Bước 3**: Nhấp vào **New VM**
{% endstep %}
{% step %}
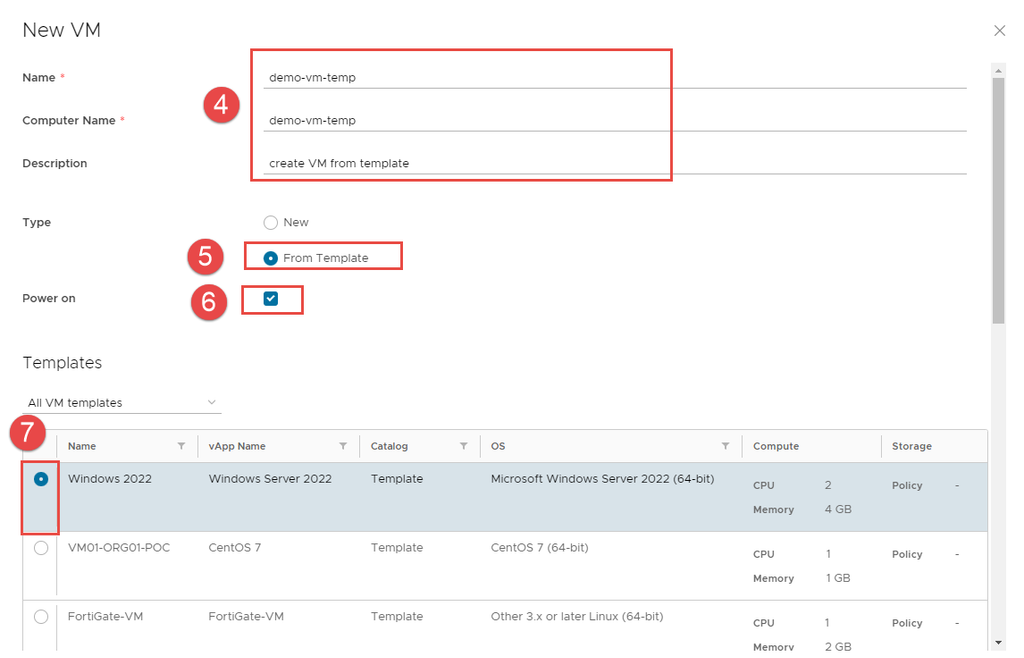
**Bước 4**: Trong hộp thoại **New VM**, nhập **Name**, **Computer Name**, và **Description** cho máy ảo của bạn.
{% hint style="warning" %}
**Attention:**
* **Name** là tên để nhận diện máy ảo, **Computer Name** là tên máy chủ của máy ảo.
* Tên **Computer Name** được sao chép từ trường **Name**, nhưng chỉ có thể chứa các ký tự chữ và số hoặc dấu gạch ngang, do đó bạn có thể cần chỉnh sửa nếu **Name** của máy ảo chứa khoảng trắng hoặc ký tự đặc biệt.
{% endhint %}
{% endstep %}
{% step %}
**Bước 5**: Từ nút chọn **Type**, chọn **From Template**.
{% endstep %}
{% step %}
**Bước 6**: Chọn ô **Power on** nếu bạn muốn máy ảo được bật ngay sau khi tạo.
{% endstep %}
{% step %}
**Bước 7**: Trong phần **Templates**, chọn template bạn muốn sử dụng cho máy ảo của mình, tùy thuộc vào yêu cầu (loại hệ điều hành và kích thước máy ảo).
{% endstep %}
{% step %}
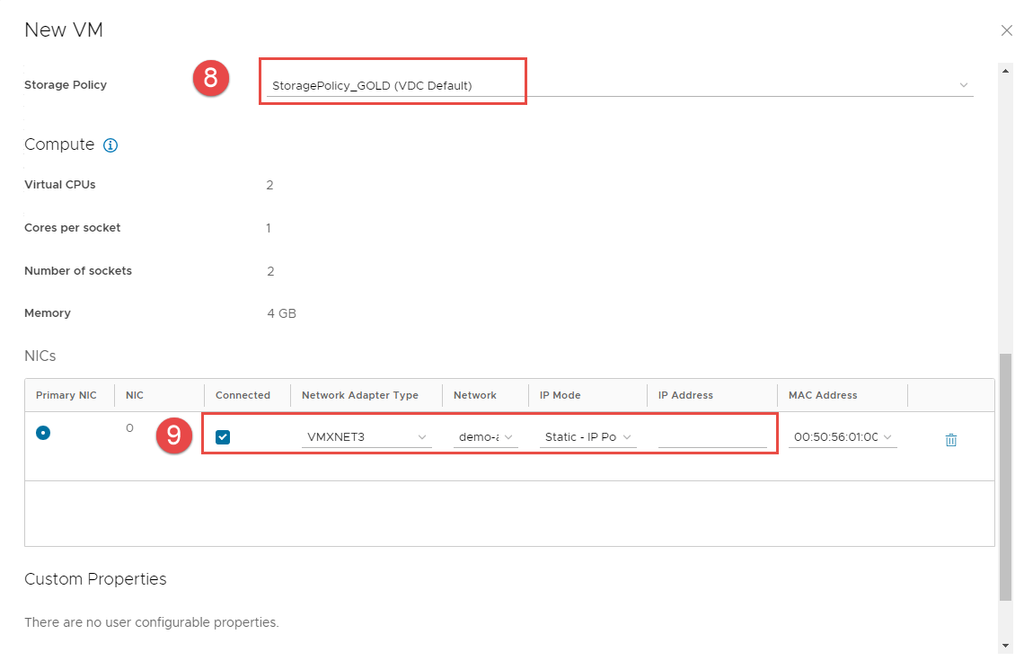
**Bước 8**: Chọn **Storage Policy**.
{% endstep %}
{% step %}
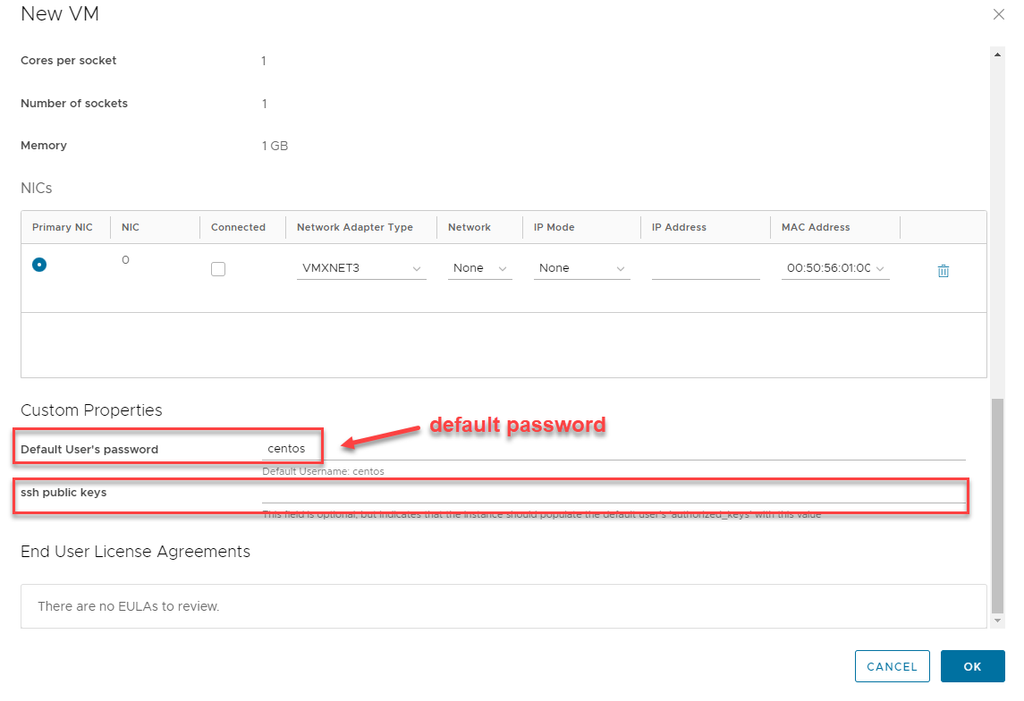
**Bước 9**: Chọn **Network**, **Network adapter Type**, và **IP mode** cho máy ảo.
**Lưu ý**: Nếu sử dụng template Linux, bạn có thể thay đổi mật khẩu mặc định hoặc khóa SSH public (optional)
{% endstep %}
{% step %}
**Bước 10**: Nhấp **OK** để lưu cài đặt của máy ảo và bắt đầu quá trình tạo.
**Attention:**
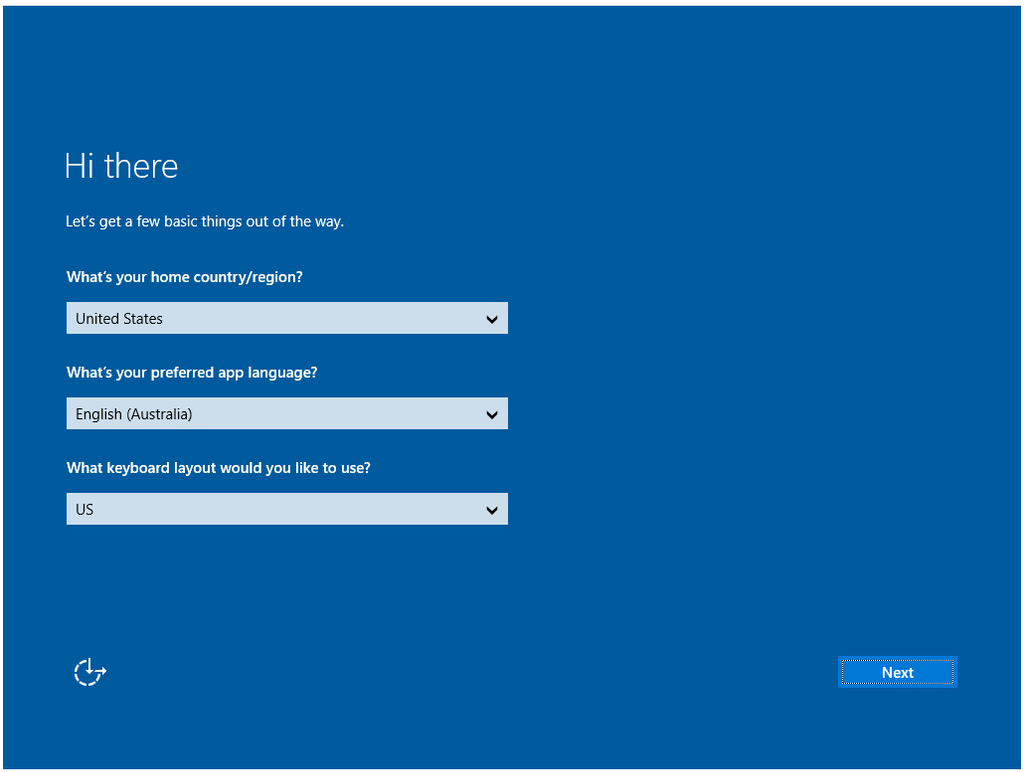
* Sau khi tạo xong bằng template Windows, bạn sẽ thấy màn hình này khi khởi động lần đầu.
* **Lưu ý**: **KHÔNG CAN THIỆP vào bất cứ lệnh gì. Hãy để quá trình hoàn tất tự động.**
**Attention:**
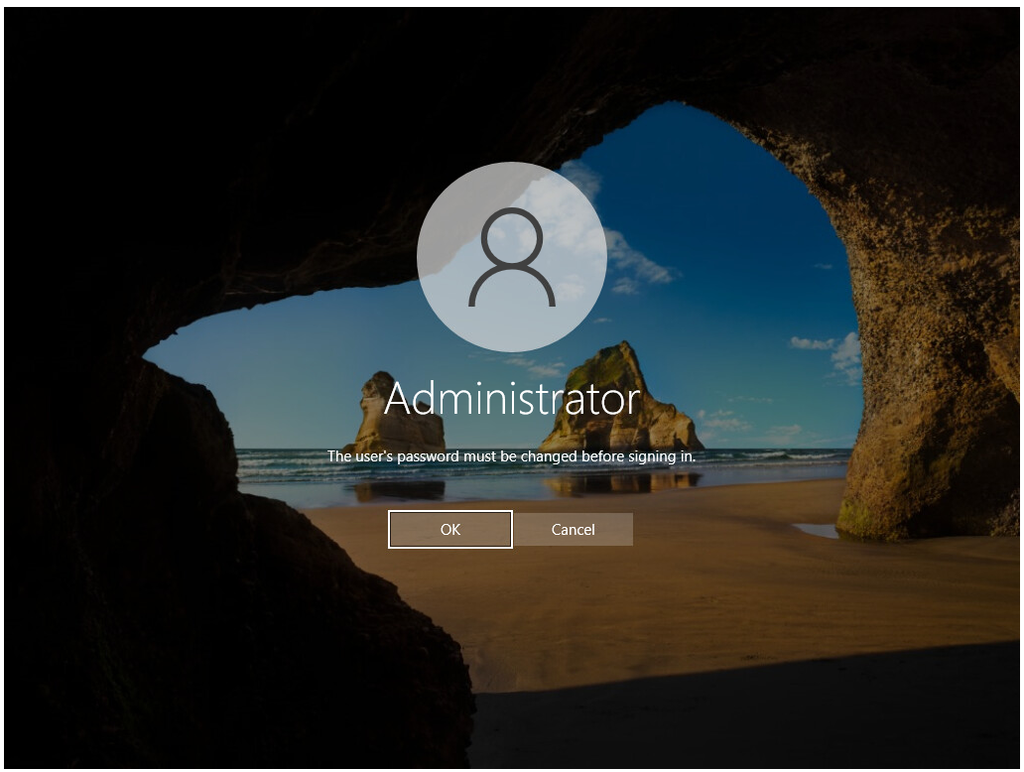
* Chỉ cần chờ máy ảo khởi động lại (khoảng 3 phút) để áp dụng cấu hình cụ thể của bạn (IP, hostname, …).
* Khi bạn thấy màn hình **Login**, bạn có thể bắt đầu kiểm soát từ đây.
{% endstep %}
{% endstepper %}
---
# Agent Instructions
This documentation is published with GitBook. GitBook is the documentation platform designed so that both humans and AI agents can read, navigate, and reason over technical content effectively. Learn more at gitbook.com.
## Querying This Documentation
If you need additional information that is not directly available in this page, you can query the documentation dynamically by asking a question.
Perform an HTTP GET request on the current page URL with the `ask` query parameter, and the optional `goal` query parameter:
```
GET https://docs.higiocloud.vn/hi-gio-user-guide-vn/compute/1.-thao-tac-voi-vm/tao-may-ao-moi-tu-template.md?ask=&goal=
```
`ask` is the immediate question: it should be specific, self-contained, and written in natural language.
`goal` is optional and describes the broader end goal you are ultimately trying to accomplish on behalf of the user. GitBook uses it to tailor the answer towards what is most useful for that goal.
The response will contain a direct answer to the question and relevant excerpts and sources from the documentation.
Use this mechanism when the answer is not explicitly present in the current page, you need clarification or additional context, or you want to retrieve related documentation sections.